Table of Contents
As businesses increasingly rely on data analysis to make informed decisions, the importance of clear and concise reports becomes more critical. Unfortunately, reports are often dense and difficult to navigate.
When that happens, it can be difficult to understand the insights reports offer.
To address this issue, Google Looker Studio has introduced a feature that allows users to create interactive reports with buttons. These buttons provide a more user-friendly experience and make it easier to access the insights hidden within reports.
Read on to learn more about how to use Google Looker Studio buttons.
What Can Google Looker Studio Buttons Do?
The buttons feature in Looker Studio offers a variety of benefits. Use buttons to navigate between different reports or sections of a report. In addition to being able to use templates to make Looker Studio easier to use, buttons help make the user experience better.
Buttons can help users execute actions within a report. For example, use a button to download a CSV file or to refresh data.
Why not make it easier for users to drill down into specific data subsets? You can when you use the buttons to apply filters to a report.
When working with data in reports, the benefits of using buttons in Looker Studio are many.
Buttons make reports more interactive and engaging. This allows users to explore data in a more intuitive way. Buttons offer an efficient way to navigate between different sections of a report or to perform common actions.
Finally, buttons help make reports more accessible to users with disabilities, such as those who use screen readers.

Three Types of Buttons in Looker Studio
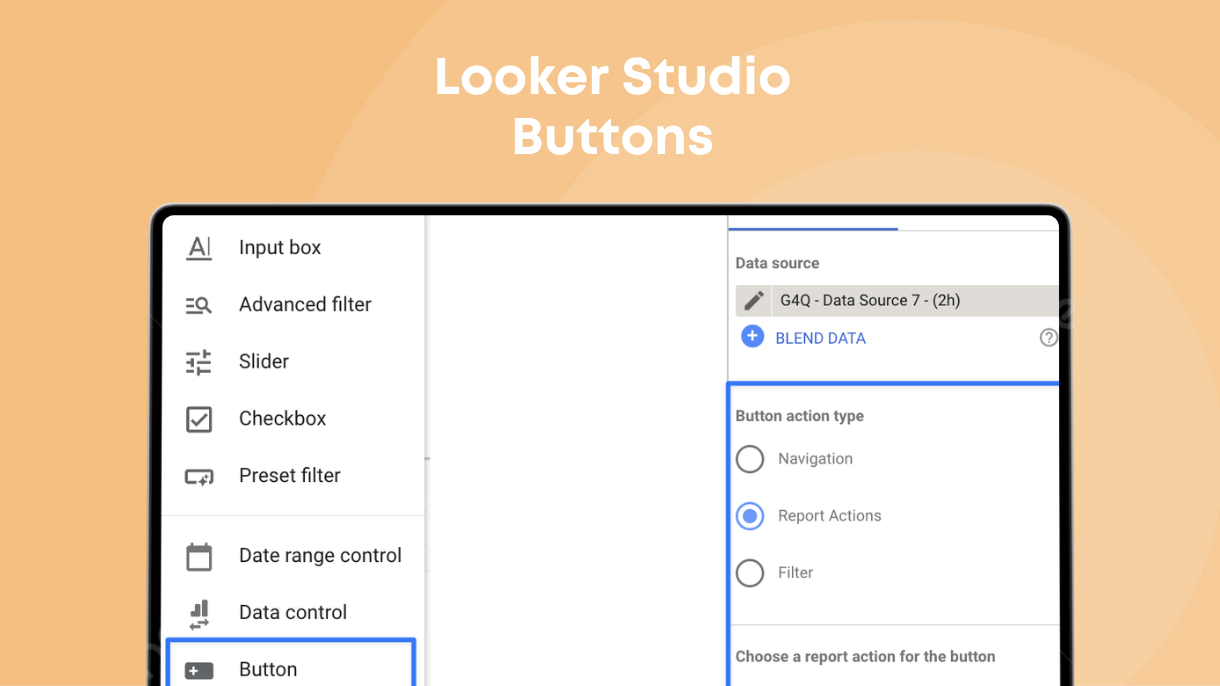
There are three types of buttons in Looker Studio: navigation, report actions, and filters. Here’s a brief overview of how each of the buttons could work for you and your users:
Navigation Buttons
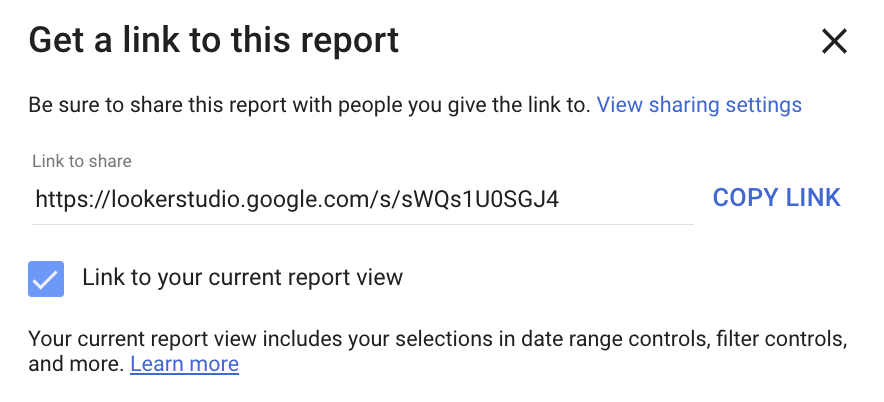
Navigation buttons in Looker Studio allow users to move easily between different reports or different sections of a report. If you need to include a table of contents or provide links to related reports, navigation buttons can do the job.
Navigation buttons are particularly useful for large, complex reports with multiple sections.
Report Action Buttons
People who need to read reports want convenience more than anything. Report action buttons allow users to execute actions within a report. When a user doesn’t need to navigate away from the report, it can save time and improve efficiency.
Use the report action buttons to make common actions more accessible. You can also use these buttons to automate workflows.
Filter Buttons
Most reports contain more information than the average user can—or wants to—digest at one time. Filter buttons allow users to apply filters to a report, which lets them drill down into specific data subsets.
These buttons are particularly useful for reports with a lot of data. They allow users to quickly and easily explore different aspects of the data.
Anything that makes working with and analyzing data is a welcome feature.
How to Add Buttons in Looker Studio
When you’re ready to add buttons in Looker Studio, you’ll start at the dashboard. Another option is to add a button to Explore. The process is similar for both options.
Here are the steps to follow:
- Open the Looker Studio dashboard
- Click the “Add” button on the top navigation bar
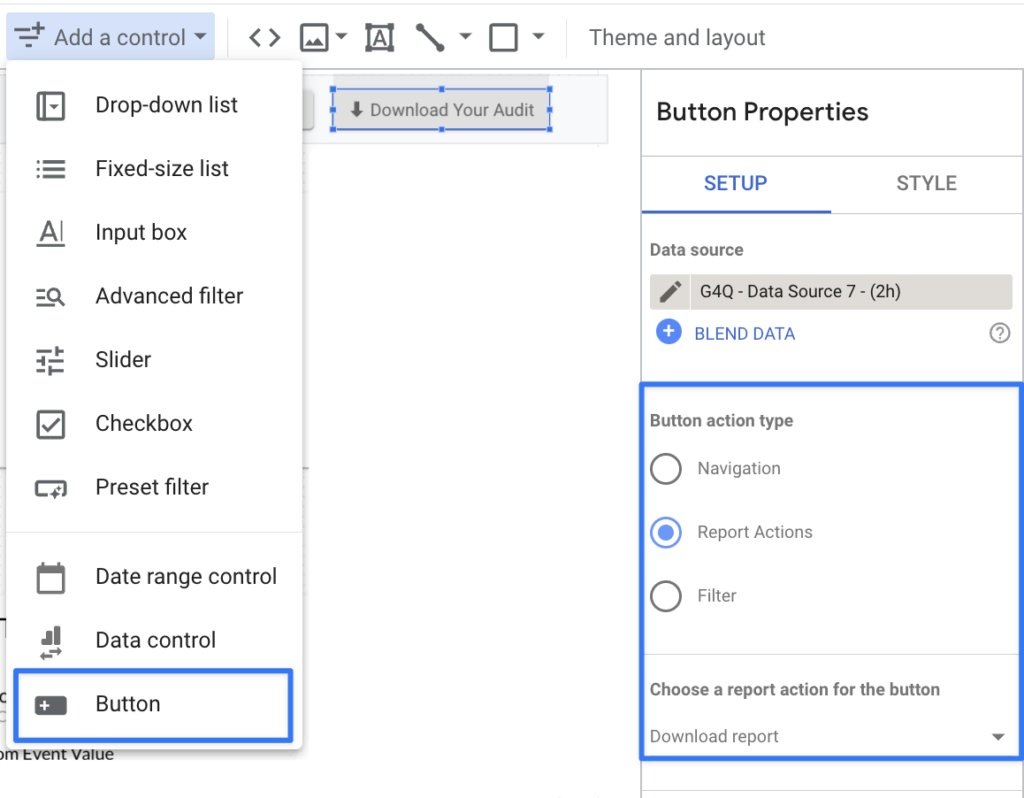
- Select “Button” from the drop-down menu
- Customize appearance in “Button Settings”
- Click the “Save” button
You have several options for customization. You can set the button’s label, background color, text color, font size, and style.
To set the action when a user clicks a button, there’s a range of possibilities. For example, you can make the button open a new dashboard, perform a data action, or run a Looker filter.
Overall, adding buttons in Google Looker Studio is a simple process that you can customize to fit your specific needs and preferences. With a little experimentation and creativity, you can use buttons to enhance the functionality and usability of your Looker dashboard.
Meet the Properties Menu in Looker
You can also customize buttons using the “Properties” menu. This menu allows you to change the button text, size, and position. You can also customize the button’s appearance by changing its color or adding an icon.
Here’s an overview on using the Properties menu to customize buttons:
- Select the button you want to customize
- Click the “Properties” button
- Click on the “Button” tab
- Adjust the button’s appearance and behavior
- Click the “Apply” button
The “Reset” button is always available if you need to undo your changes. Selecting “Reset” restores the button to its default settings.
By using the Properties menu to customize buttons, you can create buttons that fit seamlessly into the overall design of your dashboard. It’s a great way to offer users a more interactive and engaging data exploration and analysis experience.
Button Setup Options
Customizing the appearance of buttons is one helpful feature. You have several other setup options available in Looker Studio. These options let you configure the data source as well as the specific actions associated with each button.
Here are some of the button setup options:
Button Label
The button label allows you to change the text label of the button. You can use the button label option to give your button a clear and descriptive label that explains what it does.
Button Icon
Choose the icon to display on your button. Icons can help convey the purpose or function of the button visually, making it easier for users to understand what the button does.
Button Shape
You can change the shape of the button to a rectangle, rounded rectangle, or circle. This option helps you create buttons that are more intuitive and visually appealing.
Button Size
Adjust the size of the button to make it more prominent or less obtrusive. Make sure that the buttons are large enough to be easily visible and clickable. Don’t make them so large that they overwhelm the surrounding content.
Button Color
Change the color of the button to match your dashboard’s color scheme. Another way to use button color is to choose a color that contrasts with the overall color scheme.
Button Behavior
You can set the button’s behavior when clicked, such as applying a filter, opening a URL, or running a data action. Looker Studio makes it easy to create buttons that perform specific actions or tasks.
Need Help Customizing Google Looker Studio?
With an easy-to-use interface and customizable options, buttons are a welcome feature for anyone looking to create interactive and user-friendly reports in Looker Studio.
Another way you can enjoy the new button features in Google Looker Studio is by using templates. Databloo specializes in helping businesses automate digital reporting with ready-made templates.
Let’s connect so that we can help you streamline your marketing data!