Table of Contents
One of the most important responsibilities you have as a marketer is keeping track of your analytics. This will allow you to double down on strategies that work and reshape those that don’t. Google Looker Studio is a powerful tool that provides plenty of insight into key business metrics.
In this article, we’ll take a deep dive into one of the most potent features of Google Looker Studio: the CASE WHEN function. Imagine it as your key to creating new custom fields for better data analysis, unlocking the hidden potential of your data. Let’s explore the Looker Studio CASE WHEN and how you can benefit from it, taking your analysis a step further.
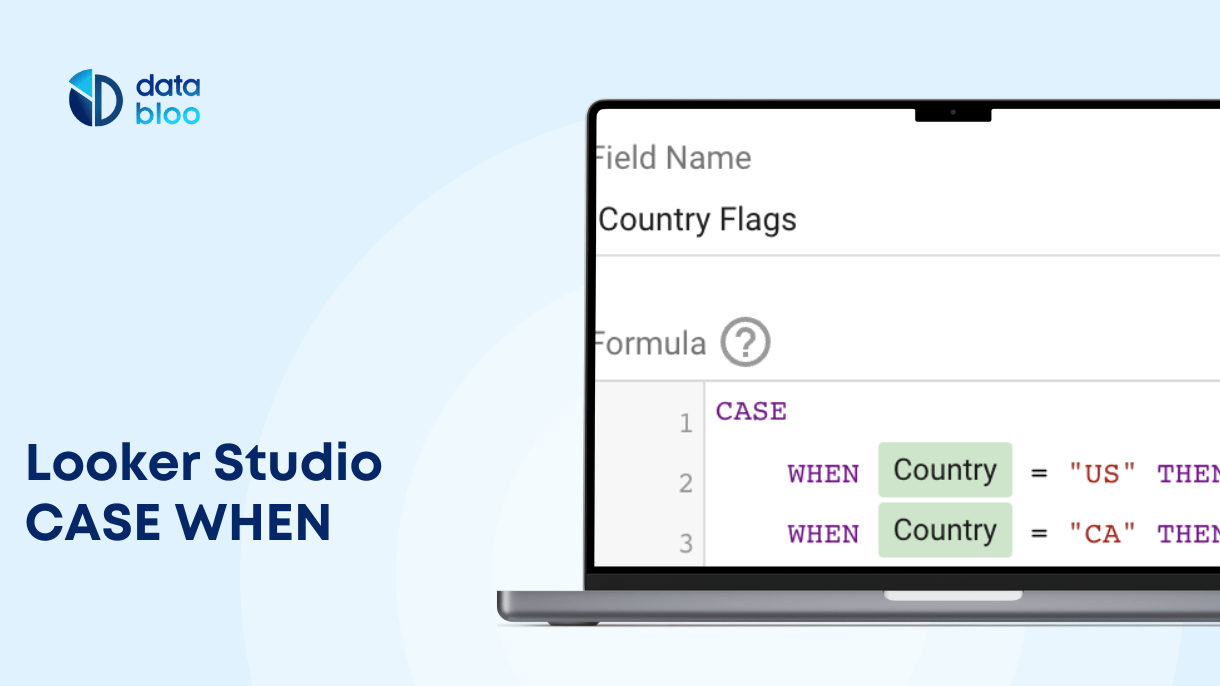
1. What Is the Looker Studio CASE WHEN Function?
For those who are unfamiliar, the CASE WHEN statement within Looker Studio allows you to evaluate your data dynamically and make decisions accordingly.
It serves as a conditional logic statement, allowing you to set specific conditions and define precise actions to be executed when those conditions are met. The WHEN function is especially useful for businesses because it can help you automate tasks that would normally take up valuable time and resources. Imagine this function as a data-driven decision-maker within your analytics toolkit. It enables you to create logical rules that respond to various data scenarios.
For instance, you can utilize it to trigger automated emails when specific customer behaviors occur or generate custom reports tailored to distinct data sets.
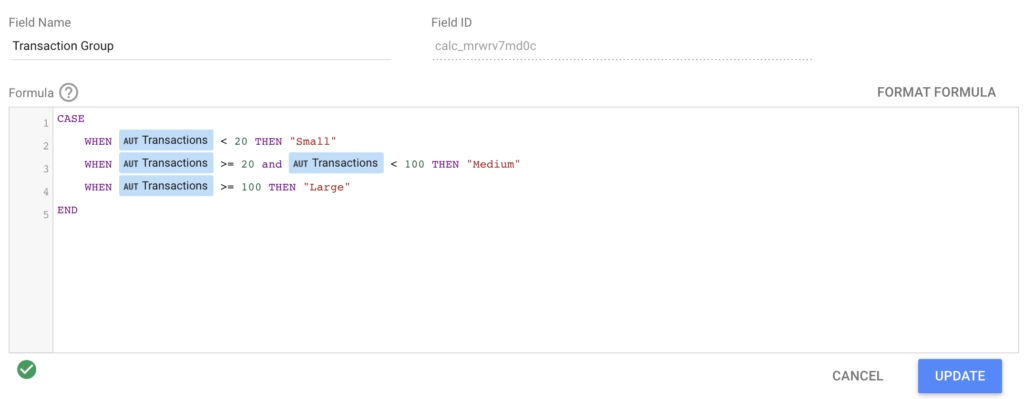
For example, you can employ Looker Studio’s CASE WHEN function to automatically categorize data values into specific buckets. Imagine classifying customer orders as “Small,” “Medium,” or “Large” based on the amount of transactions.
2. How CASE Statements Work in Looker Studio
Although this process might seem complicated at first, it’s actually quite simple. Here’s a simplified breakdown:
- Define Conditions: Start by identifying specific conditions within your data that trigger decision points. For instance, these conditions could be based on order amounts, keyword position, customer behavior, specific marketing sources, etc.
- Specify Actions: Once conditions are set, determine precisely what actions should follow when these conditions are met. These actions can range from categorizing data to triggering automated results.
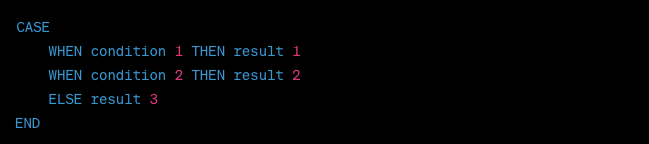
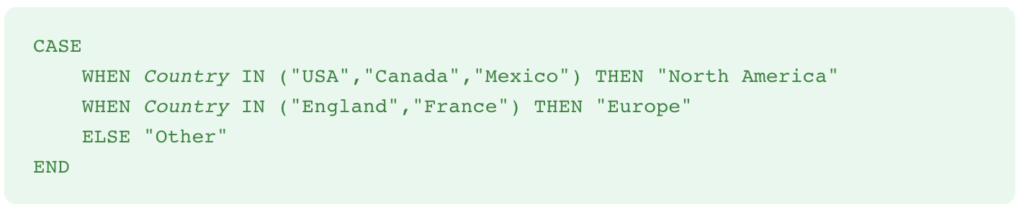
After that, all you need to do is sit back and let the function do its job. It operates with a “WHEN…THEN” structure, allowing for multiple decision branches based on various conditions. Here’s a basic CASE statement structure:
3. How to Use the Syntax of CASE
This is a key factor to keep in mind. The CASE WHEN Google Looker Studio function is only as effective as the conditions that you set. Make sure that your conditions are specific and actionable.
The effectiveness of the CASE WHEN function in Looker Studio is directly tied to the clarity and relevance of your conditions. To achieve optimal results and prevent potential pitfalls, ensure that your conditions are specific and readily translatable into actions. Here are some practical examples:
- “If the user medium is ‘organic,’ categorize it as ‘Owned Channel.'”
- “When the average position of a keyword is ’11,’ label it as ‘2nd page of Google.'”
- “For engagement rates below 5% or above 95%, classify them as ‘Failed Status.'”
- “If a video’s length is less than 60 seconds, name it as ‘Short Video.'”
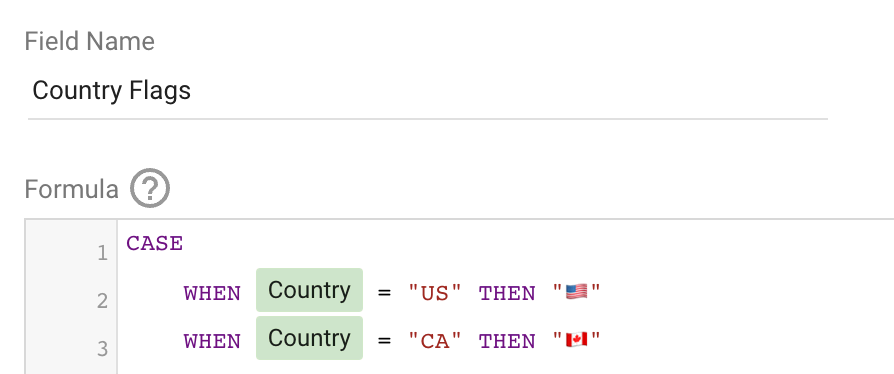
These examples illustrate how precise conditions lead to actionable outcomes, enabling you to categorize your data and make data-driven decisions with clarity. You can further customize your CASE WHEN statement by adding icons as the desired action.
4. Tips for Using CASE WHEN
When working with the CASE WHEN function in Google Looker Studio, consider the following tips:
Test Conditions Thoroughly: One of the most important tips to keep in mind is to test your conditions before you set them live. This will help you avoid any potential problems and ensure that your function is working as intended. Also, make sure that the conditions are precise and realistic.
Use Complementary Functions: Combine the power of CASE WHEN with other Looker Studio functions for advanced grouping and categorization.
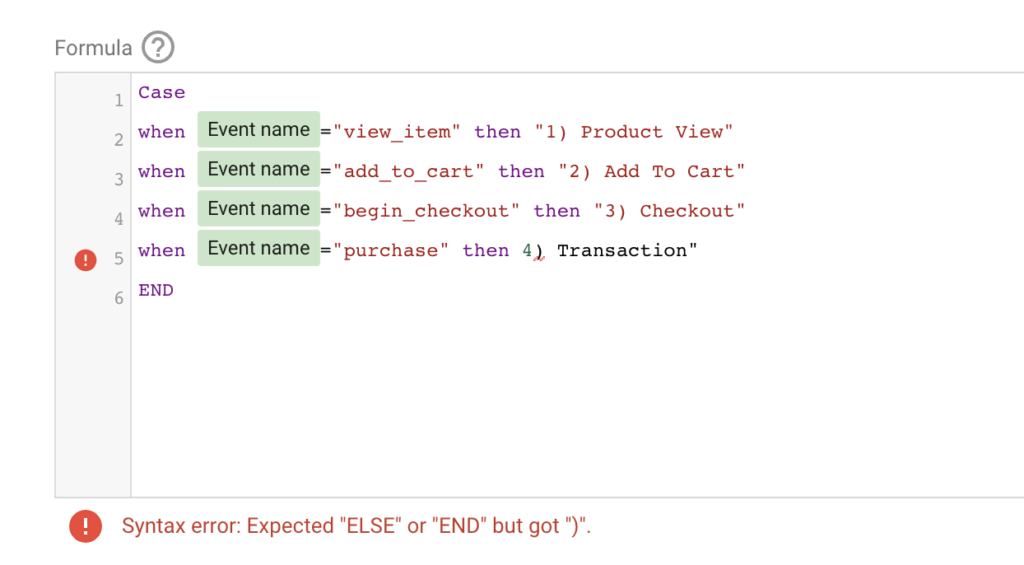
Watch for Syntax Errors: Stay vigilant for syntax mistakes that could disrupt your statements. Google Looker Studio typically provides error codes for issues such as:
- invalid field
- invalid function names
- missing quotation marks.
These tips will help you make the most of CASE WHEN, unlocking its potential for data analysis and strategic decision-making. In upcoming sections, practical examples will illustrate how these principles can be applied effectively.
5. Use Cases for CASE WHEN
To better understand how to use this function, you should also understand common scenarios in which it applies. This will help you determine how you can use it to help your company grow.
Let’s take a look at some of the most notable.
1. Identifying Attributes of Your Target Audience
One of the most common scenarios would be to use information about your audience to determine their time zone, country, continent, etc. This function can also be used to target users based on their location, which can be very useful for businesses with a global reach.
2. Creating Customer Segmentation
Another common scenario would be to use the CASE WHEN function to create customer groups. This could include information such as age, gender, interests, marketing channels, and more. You can then use this information from Google Data Studio Looker to segment your audience and better analyze your data.
CASE
WHEN REGEXP_MATCH( Session default channel group , ‘(.Paid.|.Aggregator.|.Paid Social.|.Paid Search.|.Display.|.Affiliate.)’)
THEN ‘Paid Channels’
ELSE ‘Owned Channels’
END
3. Determining Which Products Are Most Popular
You can use this function to determine which products are the most popular among your target audience.
This information can then be used to create targeted marketing campaigns and improve your sales strategy. It will also allow you to help avoid promoting products that your audience is not necessarily interested in.
CASE
WHEN item revenue >= 1000 Then “High Revenue”
WHEN item revenue >= 500 and item revenue < 1000 Then “Mid Revenue”
WHEN item revenue < 500 Then “Low Revenue”
END
4. Converting Null Values to Zero (Looker Studio Case When Null)
CASE WHEN simplifies the task of converting null values to zeros, making mathematical operations more straightforward. For instance, it’s valuable for displaying 0 conversions instead of “Null”, ensuring accuracy in reporting. CASE
WHEN Conversions IS NULL THEN 0
ELSE Conversions
END
5. Identifying Trends
The final scenario we’ll discuss is identifying trends. This function can help you determine what’s popular among your target audience and make changes accordingly. For example, you can check your keyword performance with the following formula:
CASE
WHEN Average Position < 4 Then “Top 3” THEN 0
WHEN Average Position < 11 Then “Top 10”
WHEN Average Position < 21 Then “Top 20”
Else “Rest”
End
This information can be used to improve your marketing strategy and grow your business.
Using Google Looker Studio CASE WHEN Is Easier Than It Seems
Google Looker Studio CASE WHEN is a powerful tool that can help you make better decisions for your business. Just make sure you understand how it works and how to use it effectively so you can hit your target metrics in the future.
Want to learn more about what we can do? Be sure to reach out to us today and see how we can help you.