Table of Contents
Google Looker Studio parameters are one of the many interesting features that can help you customize your reports. The Looker Studio parameters are used with data visualizations to make your reports even more engaging for the viewers. If you find yourself regularly making reports for your company, you will benefit from the data parameters by adding interactivity to them.
Google Looker Studio (previously Data Studio) is one of the best free, cloud-based tools for data visualizations, and the parameters make things even easier. They can make your reports more customizable and more interactive with your data. If you are a beginner at Google Looker Studio, make sure to use our article and learn how to create these parameters.
What are the Looker Studio Parameters?
The Google Data Studio parameters work the same way as variables in programming languages. They allow you to interact with the data provided by the users and fetch data sets from different data sources. With parameters, you can collect data from links or calculated fields, and input them into your report. You can also use parameters to create custom report templates.
There is much more you can do with these parameters to add customizations and user engagement in your reports. Here are some ways to use the parameters in Google Looker Studio:
- To display results from calculated fields
- To create custom queries
- To provide data to community connectors
The Looker Studio parameters allow report editors to request data from different sources. Parameters can return data such as cost prediction, ROAS calculation, and branded keywords traffic.
How to create a Looker Studio Parameter
Learning how to create parameters could be a bit challenging in the beginning. That is why we have made this post to simplify things for you. Before you create a new parameter, here are some terms you need to understand:
- Parameter ID: This unique number can help Google Looker Studio to identify the parameter. It is set by default.
- Parameter Name: The actual name that refers to the new parameter.
- Permitted Values: These are the values that a user can input (for instance any value, a list of values or a range).
- Data Type: Much like variables, the type of a parameter can be text, number (whole or decimal) and boolean.
Now that you know the fields required to create a parameter, let’s take a look at how you can actually make a new parameter in Google Looker Studio.
You can find the Looker Studio parameters at the top right side of your data source schema.
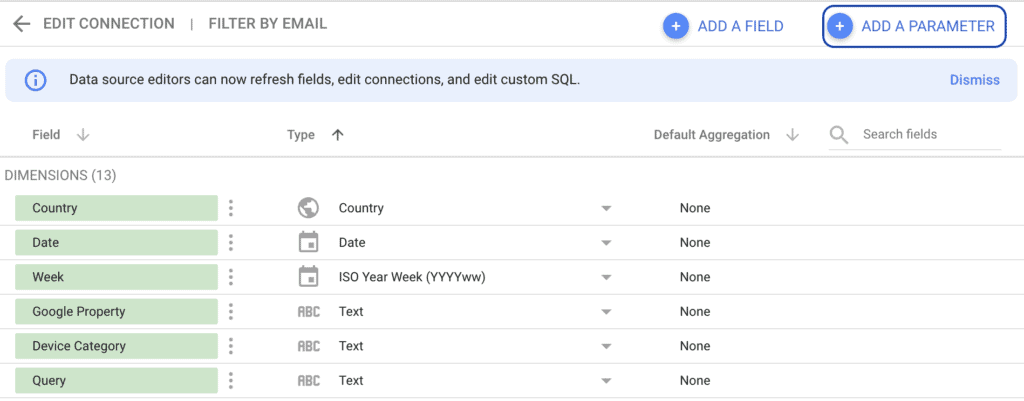
Once you click on “Add a parameter” follow the below steps to complete this process:
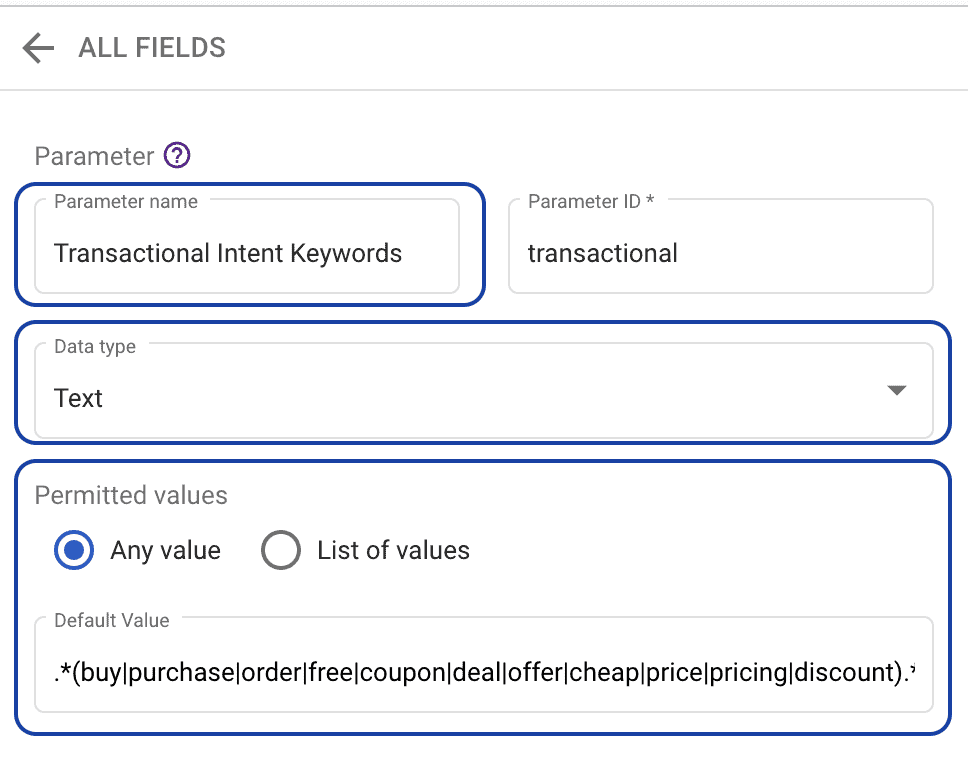
- Step 1 – Enter the Parameter Name – i.e. Transactional Intent Keywords
- Step 2 – Select the Data Type for your parameter – i.e. Text
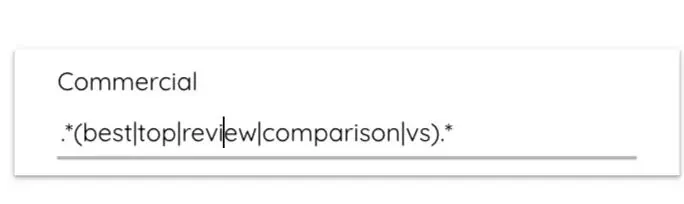
- Step 3 – Type the values for your parameter – for text values keep you can use a Regex to include all the values – i.e. .*(buy|purchase|order|free|coupon|deal|offer|cheap|price|pricing|discount).*
- Step 4 – Save the parameter
You can use the Looker Studio parameters with different sources. When creating a parameter, you can specify the desired source for your data. These include the following:
- Default Value: You can set up a default value for the parameter to use in your reports. (as shown above)
- Chart Panel: Looker Studio parameters can also be set by using the chart / component panel.
- Filter: You can add a filter control on your report to allow the viewers to change the values of the parameters.
- Report URL: By adding a link, you can fetch data from different online sources such as Facebook Ads.

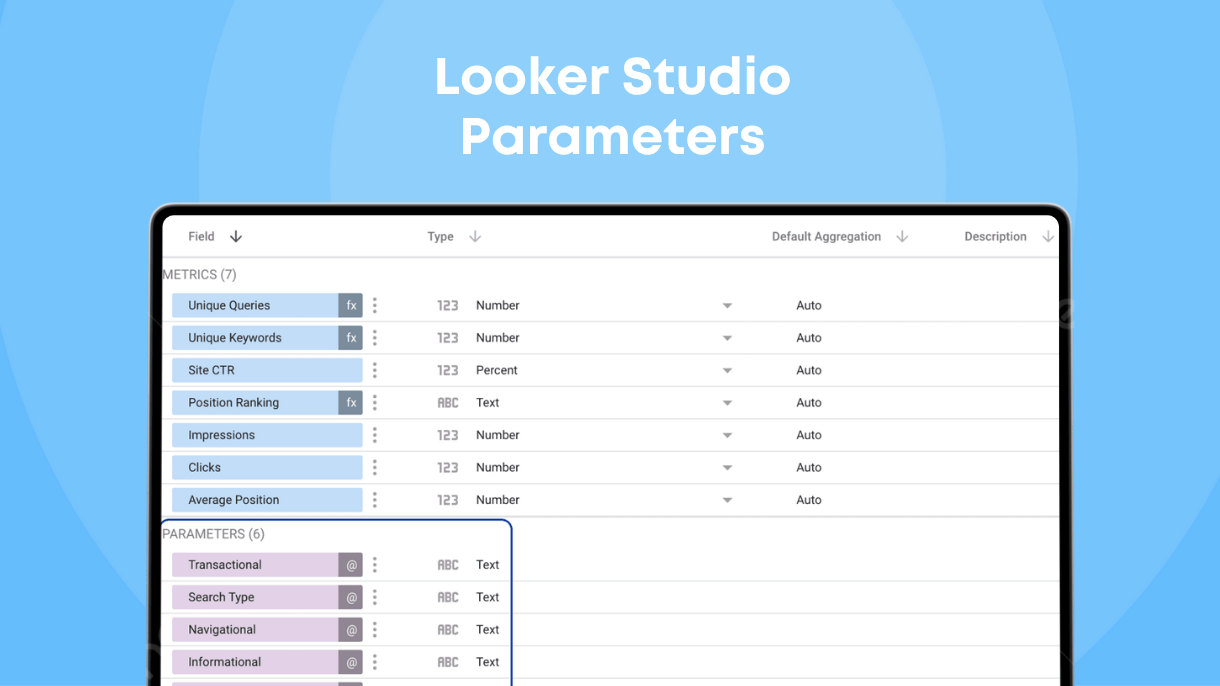
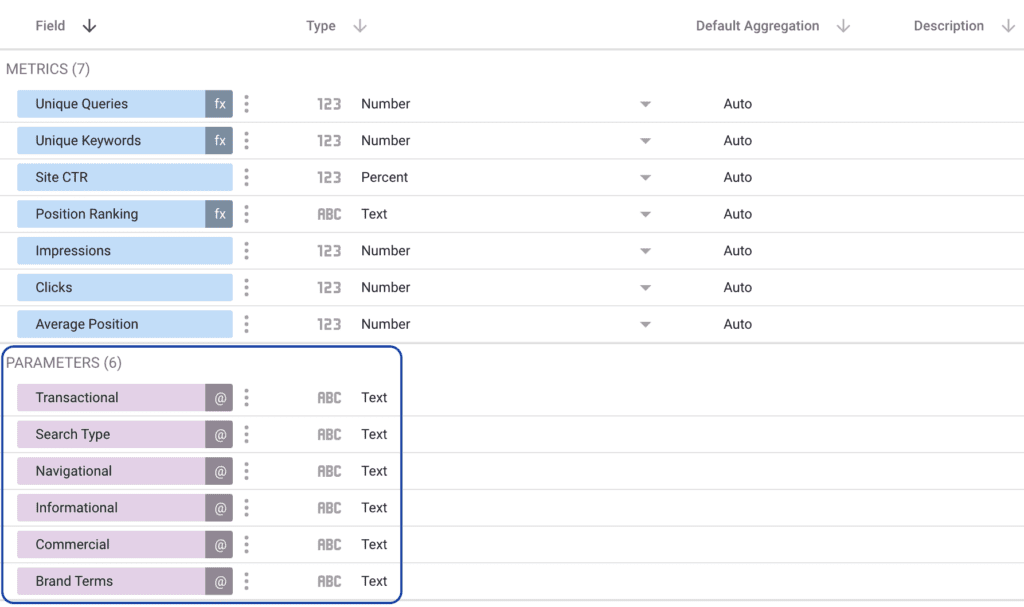
Once you have successfully created the parameter, it will appear as a purple field in your data sources. This will make it easier for you to access your parameters when making customized reports.
How to use a parameter within a Calculated Field?
In terms of Looker Studio, a calculated field is a formula that is placed on a data source and performs any arithmetic or other functions. By combining parameters with the calculated fields, you can make your reports even more interactive and dynamic.
You can use the calculated fields to extract the value of the parameter from an existing data source. You can also use the calculated fields to return the data as different data types such as numerical or text.
By using the calculated fields with the parameters in Looker Studio, you can also gather data with the help of SQL queries or REGEX statements. Calculated fields ensure that your reports can compute specific outcomes (i.e. a cost projection) based on the viewer output.
4 Looker Studio Parameters Examples
Now that you know what the Looker Studio parameters are, let’s take a look at how you can use these parameters.
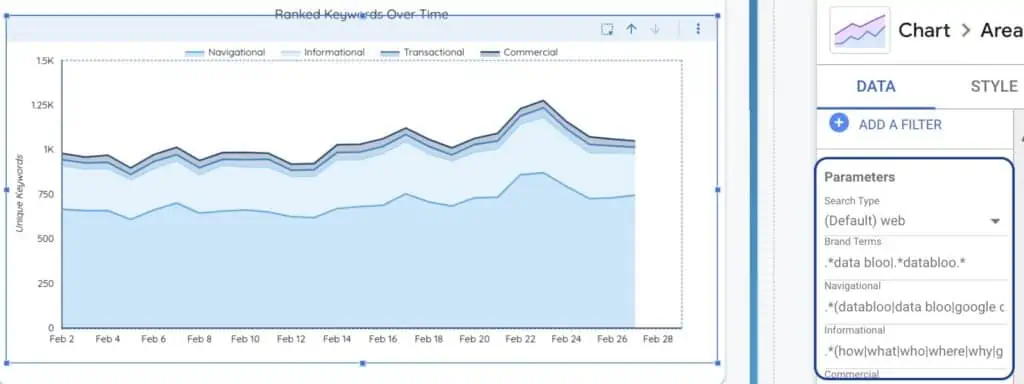
- Grouping your brand and generic keywords: With the help of the parameters, you can group your branded and generic keywords. Here is how you can do this:
- Step 1 – Create a new parameter “Brand Terms” with your own terms using the following format: .*brand term 1.*|.*brand term 2.*
- Step 2 – Create a new field to group “Brand & Generic” using the below formula: CASE WHEN (REGEXP_MATCH(Query,Brand Terms)) THEN “Brand Keywords” ELSE “Generic Keywords” END
- Step 3 – Apply the new dimension to a new chart and use the new parameter as a filter to edit the brand terms
- Creating a forecast parameter:.
- Step 1: Extract data from different sources such as Google Analytics
- Step 2: Create a new parameter
- Step 3: Create a new calculated field
- Step 4: Add an input box in the Looker Studio with a Control based Parameter
- Step 5: Create new charts with Sessions and the Sessions Forecast
- Step 6:Use the parameter to adjust the forecast value in the Looker Studio report
- Calculating the ROAS (return on ad spending) of your ads:
- Step 1 : Create a new data field and configure it to calculate ROAS
- Step 2: Add parameters to the data fields
- Step 3: Create an input box for your report and add revenue values to it to test it
- Creating a UTM builder on Looker Studio:
- With the Looker Studio parameters, you can add UTM parameters to the campaign URLs. The generated URL will allow you to automatically update with the changes you make.
Mastering Looker Studio Parameters with our Templates
Parameters provide a powerful way to interact with and customize your Looker Studio reports. By using them, you can make your reports more dynamic, allowing viewers to drill down into specific data and get the insights they need.
Data Bloo offers ready-to-use marketing templates such as Keyword Analysis Template and All-in-one Search Console Template that leverage Looker Studio parameters to help you make sense of your data quickly and easily. With these templates, you can easily have professional-looking reports that provide meaningful insights, without having to spend hours formatting and manipulating data.